Showing posts with label Linux Mint 7. Show all posts

Sunday, 19 July 2009

Installing My New Printer On Linux Mint 7 Gloria.

Setting up my printer (23 June 2009)

As it happens, we have a new printer.

It’s an HP Deskjet F2280 all-in-one.

I highly recommend HP printers as they are very well supported in Linux.

So, unpacked it, followed the setup instructions and connected it.

There was a short pause while it looked like nothing was happening and then a message popped up telling me that the printer had been installed, set up and was ready for use. So I opened a document hit print and it printed.

Excellent!

Then, because I’m that way inclined, I wanted to have a nice looking GUI to configure the printer with. And there is one available for HP printers.

Go to System > Synaptic and search for hplip-gui. And install it.


Now, to stop it running automatically (I don’t do enough printing to warrant it appearing at startup):

Go to System > Preferences > Startup Applications and untick the HP System Tray Service.

Sorted, as they say.

Getting rid of the Keyring Password.

The Keyring Password

Now, when I first tried to connect to a wireless network, I was asked to create a password for the keyring. So I did and I used a different password to my user password.

Then I found that every time I booted, I was asked for this password before I could connect to my network. Gwibber, the Twitter client, wouldn’t or couldn’t use the network to access Twitter. Which, I assumed, was a permissions problem and put it down to something to do with the Keyring.

I found this a bit irritating and went to find a solution. And here’s what I learnt.

This machine is for my use only, so I didn’t really need to set a Keyring password.

To remove the password and stop the Keyring constantly asking for it, go to:

Applications > Accessories > Passwords and Encryption Keys

Hit the Passwords tab and then right click the Keyring Password (or whatever it’s called) > Change Password.

You have to put the old password in but then don’t type anything into the other two boxes and hit Change. A message pops up about lack of security, but that’s fine. Hit Ok or whatever and then reboot to see the changes.

Nice.

Installing Linux Mint 7 Gloria On The Eee PC 701

Just a quick heads up on this.

I used to be a 701 4GB owner until June 2008 when I bought my 900. I gave my 701 t0 my brother in the hope that he and his family would warm to Linux. I left him running Xandros in advanced mode.

I popped over to see my brother last week and after showing him what BackTrack 3 could do on my 900 he said he wanted it on the 701. Which I did. BackTrack 4 Pre Release, in fact.

Now, while it worked well, it booted to a command prompt requiring that you type startx to get the thing going and when you are logged in, you’re logged in as root. All of which is fine and dandy if you know what you’re doing, but in a family with a six year old who likes to go onto the CBeebies site and use Tux Paint, it’s maybe not the right distro.

So I installed Mint 7 instead. And it works as well as it does on the 900.

The install was almost identical to the 900 install that I ran through earlier, except when the partitioning screen appears, be sure to choose the “Use the entire disk” option.

After the install, I tweaked it, keeping in mind that a small child would be using it, I stripped out the same stuff as I did on my 900 install and also removed Brasero, Pidgin, The Gimp and Open Office.

And then added BleachBit, Ubuntu Tweak, Wxcam, Picasa (she loves taking photos), Abiword and, of course, Isla’s beloved Tux Paint.

Now, if you install Tux Paint on the 701 you really must install the tuxpaint-config package as well. This little utility will allow you to choose the correct screen settings, making the most of the 701’s small screen. I don’t remember if the configuration utility appears in the menu or not, so just open a terminal, Applications > Accessories > Terminal, type tuxpaint-config and hit enter.

All in all, Mint 7 on the EeePC 701 4GB is a very pleasurable experience. I could have removed more and given it a bit more room, but a machine which is only used for browsing doesn’t really need loads of free space and after following my install guide and tweaking it, there was 1.3GB free.

Enjoy!!

Putting Mint 7 On The Big (Well, Bigger) Screen.

Today I decided that it would be nice to see Mint on a much bigger screen than my little Eee 900’s.

Now, the TV has a VGA port on the back, the Eee has one on it’s right side. All I need is a cable.

So, I popped off to Argos and bought a Belkin Monitor Cable.

£25 FOR A CABLE!!! *falls over*

After being brought round by a member of staff, I managed to justify the purchase by telling myself “it is well made and feels nice and sturdy and I’ll never have to buy another one…”. I hope.

So I got home and had a cup of tea to steady my nerves and then fired up the Eee and the TV. Then I plugged the cable in and switched the TV’s source to PC.

Now, at this point I made mistakes. Lots of them. I assumed that by going to System > Preferences > Display, I would be able to configure it.

Stupid boy…

I spent ages lost in a pair of screens that were somehow joined together, wondering where my pointer had gone and thinking “all I want is big screen Mint. If I have it on the big screen, I won’t need it on the little one.”

I managed to get it sort of right, but the screen resolution was stuck at 800x600 on both screens.

The answer to what I wanted was fairly simple. And I found it in Synaptic.

I installed the gnome-randr-applet and added it to the panel.

To add applets to the panel, right click an empty space on the panel > Add To Panel and choose from the list.

The new applet is called Display Geometry Switcher.

With that added, it was a simple case of logging out and then back in again and choosing the resolution I wanted (1320×768) by left clicking the applet.

When I choose that resolution, the Eee’s screen switches off. That’s fine.

A word of warning, when you log out, the login page will not let you see what you are typing. Just the login page. This doesn’t affect anything else. I don’t know why.

And here it is. Not a particularly good photo, but there you go.


You can’t really see it here, but the display is nice and crisp. I’m very impressed.

And when you want to remove the cable, either log out (hit CTRL+ALT+Backspace) and remove it or change the resolution using the applet so that the Eee’s screen comes back on.

So, there you are. Now, what I really need is a wireless keyboard with built in touchpad (which should work out of the box with Mint) so I can sit on the sofa with my Eee under the TV…

Tweaking Linux Mint 7 Gloria On The Eee Pc 900

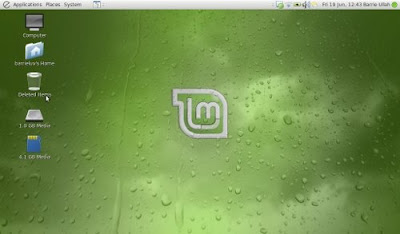
So, you’ve installed Linux Mint 7 on your EeePC 900. Now let’s tweak it a little.


This simple guide will remove stuff and add stuff until your system is identical to mine and ends up looking something like this:


At this point, I will assume you are connected to the internet either via wireless, ethernet cable or mobile and you have broadband.

Obviously, you don’t have to do everything here, but this is what I did and it may give you some pointers as to what to do and how to do it.

I use Gmail, Hotmail and Yahoo for email so I don’t store email on my machine, hence the removal of Thunderbird.

The default Bittorrent client will be changed from Transmission to Deluge.

Computer Janitor will be replaced by a combination of Ubuntu Tweak and BleachBit. Both are excellent additions to any Gnome setup.

I don’t need Giver, X-chat or Gnome Do.

Note: I highly recommend removing the Compiz stuff!

Your machine will respond a lot quicker without the eye candy and certain applications don’t work very well with eye candy enabled.

You may disagree.

Whatever.

We will also be adding some stuff later that is found elsewhere on the net.

“Get on with it!”….

Open Synaptic (System > Administration > Synaptic).

Enter your password.

First, go to Settings > Preferences > Files > and mark “Delete downloaded packages after installation”.

Synaptic

That will help save space.

Hit the Reload button (sort of top left).

There will be a lot of updates to get, but ignore them for now.

To remove/add packages, find the package, right click it and choose the action. You don’t need to use Completely Remove, just Remove)

Here is a list of stuff to remove:

compiz
compiz-check
compizconfig-backend-gconf
compiz-setting-manager
compiz-core
compiz-fusion-plugins-extra
compiz-fusion-plugins-main
compiz-gnome
compiz-plugins
compiz-wrapper
computer-janitor
computer-janitor-gtk
giver
gnome-do
thunderbird
transmission-common
transmission-gtk
xchat-common

And here is a list of stuff to add:

asunder (Cd Ripper)
audacity (Audio Editor)
bleachbit (Privacy Clean Up Tool)
deluge (Bittorrent Client)
gwibber (Twitter Client)
lame (Allows Apps To Rip To MP3)
skype (VOIP Client)

Once everything is ticked, hit “Apply”

This may take some time depending on your connection.

Once it’s all done and dusted, hit the Reload button again (just to be sure) and then hit “Mark All Upgrades” and then Apply.

Now, this really will take some time, so have cup of tea...


That's better...

Your kernel will be upgraded at this point, so when it’s all done, reboot.

When you reboot, the Grub screen will look a little different, but there’s no need to touch it. Those other options will be gone soon enough.

Now we’re going to go get some other bits and pieces.

Open Firefox and go and download these packages:

Picasa (Google’s Photo Manager. Even if you don’t have a Google account, it’s still a nice app.)

Ubuntu Tweak (A very useful tool for cleaning and configuring Ubuntu based distros)

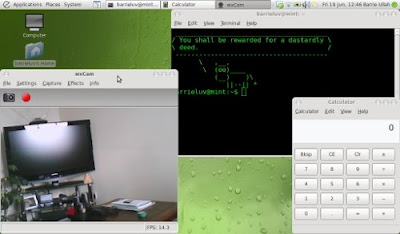
Wxcam (A webcam app which is easy to use and can record to .avi with sound)

Elementary Icon Set (Clean, simple and efficient)

Elementary Theme (Clean, simple, efficient)

The first three are .deb packages so just double click them to install.

The Elementary stuff comes in .zip files. So right click them, choose (Extract Here) and then open the resulting folder to get at the .deb package.

Once this is all done, fire up Ubuntu Tweak and once it’s up go to Applications > Package Cleaner.


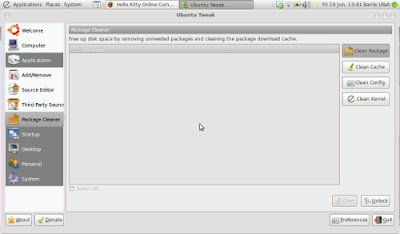
Hit the unlock button and then use the cleaning tools to clean up all the mess you made by installing stuff. Yes, clean the kernel, too. This will remove the old kernel and next time you boot, you will notice Grub has less options available.


Now fire up BleachBit, tick all the options down the side and hit preview. BleachBit will scan your machine for stuff to get rid of (not applications, which is what Computer Janitor did to me and is the reason I removed it earlier). Once it has finished scanning, scroll to the bottom of the list in the right hand pane and you should see how much stuff there is to get rid of, like this:


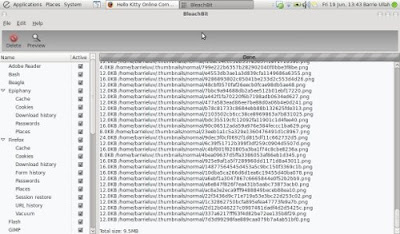
And then hit the Delete icon.

Lovely.

Almost forgot…

To change the theme and icons, right click the desktop, Change Desktop Background. Choose your background, hit the Theme tab, choose eGTK and then hit Customise > Icons > Elementary.

If your panel is still at the bottom of the desktop, right click it > Properties > Orientation > Top.

To change the terminal colours, open a terminal > Edit > Profile Preferences > untick “use colours from system theme” > choose Green on black from the Built in schemes drop down list. Then hit the General tab and untick “Use the system fixed width font”.

_____________________________________________________________________________________

_____________________________________________________________________________________

Now for some kind of justification.

I have not installed Adam’s kernel nor any of the scripts and utilities that are available to make this distro more Eee specific. The reasons behind this?

I’m sick of messing around with the command line, editing files and emailing developers because the scaling doesn’t work properly on machines with Celeron processors. Nor do I want or need to turn off the webcam or wireless.

A lot of hard work goes into those packages and there are many users who are very happy with them.

The people who develop those things aren’t getting paid and I see no need to talk about them in a negative light.

But, those utilities just ain’t for me.

I wanted a full featured Gnome/Ubuntu based distro that was easy to set up and easy to maintain with no eye candy to slow it down and no other utilities that I didn’t want.

And this guide is the result of me getting what I want.

Your comments and questions are welcome.

Peace.

Saturday, 18 July 2009

Installing Linux Mint 7 Gloria On The Eee PC 900

Welcome to my short guide on installing Linux Mint 7 or Gloria, as it is also known, on the EeePC 900 20gb.

I am going to assume you have a way of installing it, either from a USB flash drive or an external CD/DVD drive, and are able to run Mint 7 live.

Mint 7 pretty much works out of the box on the 900, the wireless and webcam perform well and, with a little tweaking, it’s very snappy. More so than regular Ubuntu and some other Eee specific distros I’ve used.

I’ll be removing some stuff and adding bits, nothing heavy, just packages. I won’t be installing the Eee specific kernel nor will I be adding any of the scripts that are available. I want to keep this simple.

Sometimes, less is more…

So, let’s aume you’re running Mint as a live distro from USB. I’m running from SDHC and I have a UB stick inserted.

So, here’s the desktop:


To start the install, double click the Install icon on the desktop.

You will be greeted with the Install welcome screen:


Choose your language and hit the Forward button.

Next, select your region. I’m in London, as you can see. If you can point to where you are on a map, well done you!

For those who’s geography leaves something to be desired, choose from the drop down lists.


Now to choose your keyboard. If you’re not sure, accept the default. It should be correct. You can type stuff into the empty text box to check.


And now the best bit…

Partitioning.

This is the bit that throws many new users.

In this instance, we’re going to use the smaller 4gb drive for the operating system and the larger 16gb drive for our files.

Why?

‘Cos I said so.

I suppose I should point out that the following procedure will wipe both drives clean. So make sure you’ve backed up any files you need to a flash disk or whatever.

So, we want to set up our partitions manually because the installer doesn’t just do it for us.

On the Prepare Disk Space page, we need to check the button titled “Specify Partitions Manually (Advanced)”, like this:


(Mine says something about deleting Linux Mint 7 Gloria because I have already installed it and am running the installer from a live disk to get the screenshots. You don’t have to worry about what it says there.)

***For those with the 16gb 900, which has a single disk, choose the “Use the entire disk” option and then accept whatever the install throws at you. You're next step will be User Details***

Click Forward.

Now, highlight sda (the second line) and then hit Edit Partition and make it all look like this:


So, we are editing the 4gb drive which the operating system is going onto. We will use the Ext3 Journaling File System from the drop down list. We want to format the partition, so check the box and the mount point will be the / symbol from the drop down list.

Then click OK.

Now highlight sdb (the fourth line) and then hit Edit Partition and make it all look like this:


So, we are editing the 16gb drive which will store our files, documents, music etc. Again, we will use the Ext3 Journaling File System from the drop down list. We want to format the partition, so check the box and the mount point this time will be the /home option from the drop down list.

Then click OK.

Now hit Forward.

It’s at this point that I stopped getting screenshots. You will get a pop up message asking about a swap partition etc. We have 1gb of RAM in our machines and therefore we don’t need swap. So, just hit whatever you need to hit to make it go away.

Another screen will want your user details. Just enter your details and passwords here. Don’t hit any other buttons.

And then just hit OK or forward to get the install started.

The install itself doesn’t take long (if the screensaver kicks in, just move the cursor or hit the space bar).

When the install is finished, reboot.

Now, we are going to check that everything’s switched on so we don’t put up posts on forums because we believe our wireless isn’t working, making us look stupid.

When you boot, at the Asus screen hit F2 to bring up the BIOS.
Using the arrow keys, go right to highlight “Advanced”.
Then go down to highlight “Onboard Devices Configuration”.
Hit Enter.
Make sure that all the entries are enabled.
If one isn’t, go down to highlight it, hit enter, change it and hit enter.
Press Esc twice and then enter.
The machine will boot and in about 30-40 secs you will be greeted with the login page. Enter the username and password you provided earlier and in about 10 secs you will have your newly minted EeePC staring at you.

Joy!

Now, let’s tweak it a little…